Benefits of Project Locations
- Consistent Data
The main benefit of project locations is that you define the list once, then it is available to use in all surveys associated with the project. This streamlined data entry helps with accurate and consistent reporting. - Filtering Surveys for Export
When exporting you have an option to select the "Location" to limit the data to the surveys assigned to that specific location. For example, if you have five sites with five different people to report to, you could export a separate set of reports for each site. - Associated Lat/Long
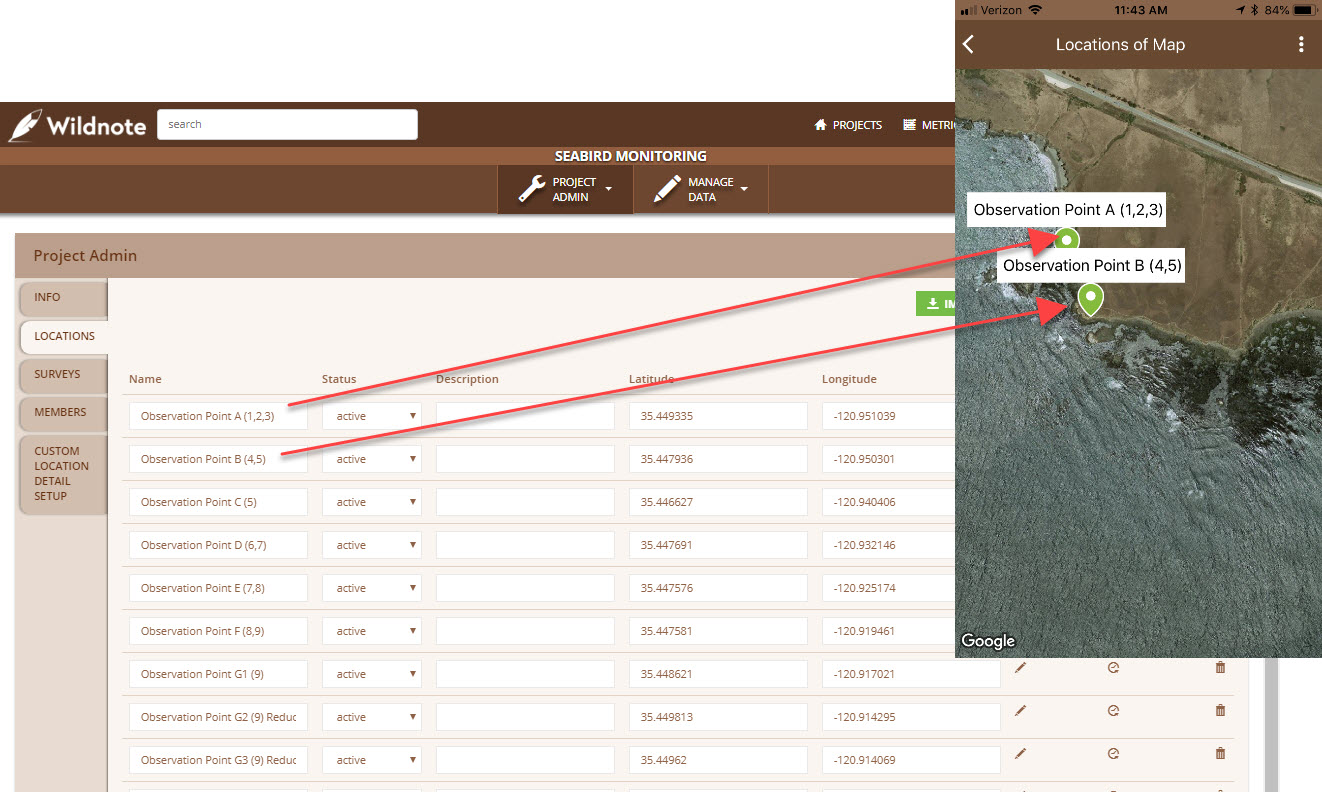
Each location can be assigned a lat/long point. On the mobile app the users can view project locations on the 'Map View." This can be help your team to find designated spots with speed and accuracy. - Additional Metadata
Each location can include additional custom metadata such as contact information and addresses. The information will not appear on the surveys, but it is available to include in reports.
Using Locations
To use project locations you need to:
- Create the locations list.
- Add the locations question to surveys.
- Export the survey data with locations.
- (Optional) View the locations on the map view.
Create Locations
- Go to PROJECT ADMIN > LOCATIONS.
- Enter the Name and optional data such as Latitude and Longitude.
- Click SAVE.
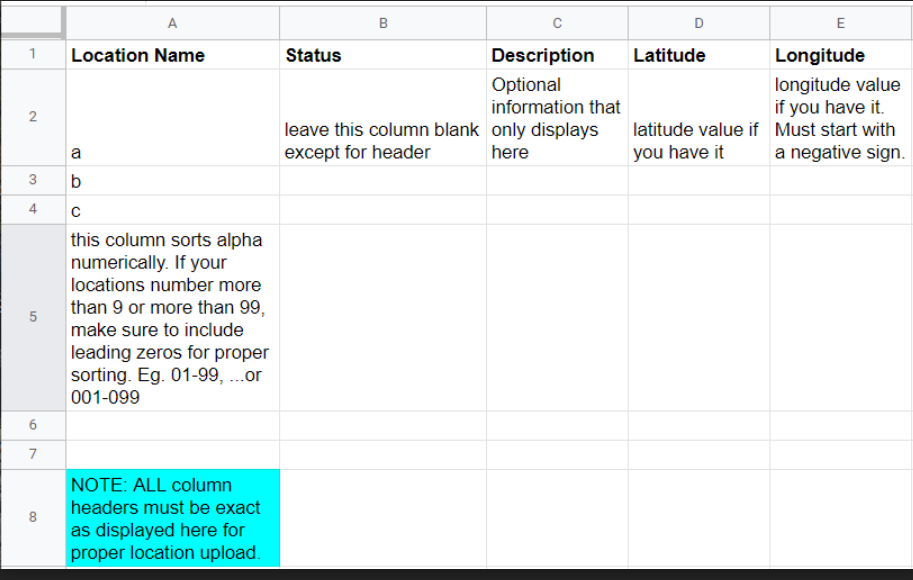
PRO TIP: If you have a long list of locations or if you plan to use the same list for multiple projects you can import the list by selecting the Import Locations button. Format your location information exactly like the image below and save it as a xls or xlsx file. Choose the file and click IMPORT.
Add Location Question to Survey
- Go to PROJECT ADMIN > SURVEYS.
- Click EDIT button next to desired survey.
- Scroll to the bottom and click 'ADD QUESTION.'
- For the 'Question Type,' select 'Location single select with search.'
- Enter label for 'Question Text.'
- Click SAVE.
Export Survey Data with Locations
- Go to MANAGE DATA > EXPORT.
- Pick the desired export type.
Note, some exports such as the PDF will include Location metadata such as contact information and addresses. Please contact support@wildnoteapp.com for custom needs. - Complete the Report parameters to run report by ID or Date.
- (Optional) Select the Location option to filter by a specific location.
- Export the data.
(Optional) View Locations on the map view
- From the mobile app select the project.
- Click the 3 ellipses in the upper right to display the project menu. Select 'Map View.'
- Click the 3 ellipses in the upper right to display the map menu. Turn ON Project Locations.
- Zoom in or out to see your project locations.
Use Case
A customer set up location lat/long points along a coastline so that all the team members would be able to find the observation points with ease and accuracy. On the mobile app the users would view the project locations in the 'Map View." This was particularly helpful because there was a high turn-over of data collectors and the visual landmarks were vague.