Start a project, copy the correct USACE Regional form from the Wildnote Library, add your default information, invite your teammates, collect data, use the editable grid for QA/QC and export right into the approved formatted report.
This article details the following steps:
- Set up your New Wetland Project
Complete the Project Information (State and Region) - Edit the Wetland Form Template
Define Default Answers (those questions that have the same answer on each data sheet) - Assign Members
- Collect Data
- Export your Wetland Report
- Export optional Wetland Photo Report
Set Up the New Wetland Project
Log into Wildnote on the web app. Click the green NEW PROJECT button. For detailed steps you can refer to this short video, "Videos: Project Set Up." If you don't see the NEW PROJECT button, contact your company administrator. You must have Project Admin rights on at least one project in order to start a new project. The instructions that follow describe how to set up the added functionality for Wetland Projects.
Complete the Project Information
Under GO TO>PROJECT SETUP>INFO, set up the following:
- Name your project.
- Set the Project type as Wetland Delineation
- Leave the Status as active.
- For Location label, put "Sample Point"
- Choose State and Wetland region
- Click SAVE to access the rest of project set up.
Pick a Wetland Regional Form from the Wildnote Library
Working with Wetland delineation subject matter experts, the Wildnote team has created the US Army Corps of Engineers Wetland Determination Data Forms for all 10 United States regions . All you need to do is select the form based on your region.
- Go to PROJECT ADMIN > FORM LIBRARY
- Click the WILDNOTE LIBRARY tab
- Go to the Wetland section and check the box next to the regional form you wish to copy to your Company Library and Project Library.
- Click the purple COPY TO PROJECT button and the system will create a duplicate of the library template and place it in your project.
- Once the duplication is complete, you can find the form under PROJECT SETUP > FORM LIBRARY>PROJECT LIBRARY.
Rename Your New Form
It is important to rename the form to a name that reflects the project name as this form will contain default information that is project specific. Taking the time to do this step will help keep your Company Library organized so you can easily see which form goes to which project.
- Go to PROJECT SETUP > FORM LIBRARY
- Click the form name you wish to edit.
- Click the FORM DETAILS tab.
- Change the name.
- Scroll down to SAVE.
Define Default Answers on the Form Template
To save time in the field, you may specify default answers to auto-populate each time a new survey is started.
- Go to PROJECT INFO > FORM LIBRARY
- Click the form name you wish to edit.
- You will be in the FORM LAYOUT tab of the form builder.
- Expand all questions by clicking EXPAND QUESTIONS on the top left of the screen.
- Click the green EDIT button to the far right of the question you wish to edit.
- Enter the Default Answer.

- Click SAVE.
- For example, you probably know the Project/Site name, so this can be added in advance. You also probably know the City/County, State, Plot Sizes etc. Just look for the question text in the first column and follow the above steps to make field work easier.
Assign Members
Assign team members to your project from PROJECT INFO >MEMBERS tab. If you do not see a team member in the list you will need to "Invite a Team Member to your Company Projects."
Choose Export Types for the Project
Associate the correct export types for your project depending on what your deliverable will be. Suggested export types include: USACE Wetland, Photo Log Builder, Tabular, Species List and Geospatial Google Earth.
NOTE: Once a form has been added from the Wildnote Library in any project, it is automatically added to your Company Library for future use.
- GO TO>PROJECT SETUP>EXPORT LIBRARY
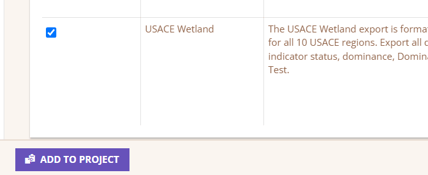
- Choose either the Company Library (see note above), or Wildnote Library and select the export types you wish to have available when you are exporting your data. Place a check in the box and choose ADD TO PROJECT. At minimum, you will want to include the USACE Wetland and Photo Log Builder in your export list.
Collect Data
Before your team goes out in the field make sure they are set up by sharing this document, Wildnote Quick Start for Mobile Users.
PRO TIP: Have each member run through a complete survey before they go out in the field. Walking through the steps in the office gives them a chance to ask questions which will save valuable time in the field.
Use the Editable Grid for Easy QA/QC
Once your data has been synced to the cloud, it is available for QA/QC. There are a couple of ways that seasoned Wildnote wetland users go about this. If you want to see your data in the familiar USACE format, then jump to the next section and learn how to export your data.
If you prefer to look at your data in a grid format and see data from more than one form at a time, then use our Editable Grid feature.
- Go to PROJECT DATA >EDITABLE GRID
- Choose your form from the drop down list in the top left corner.
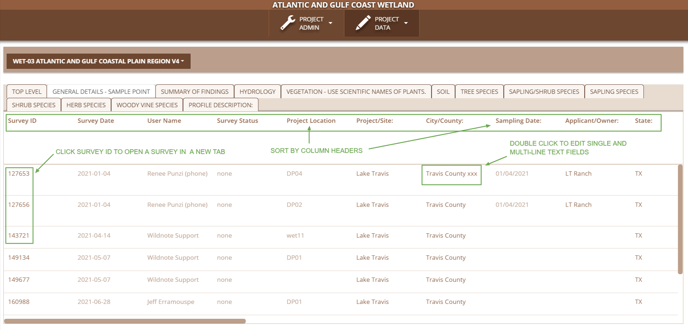
- All of your data will appear in grid style. The wetland forms are build in sections, and those sections appear as tabs in the Editable Grid.
- You can resort your data alpha-numerically A-Z and Z-A by clicking on any of the column headers.
- The Survey ID is a hotlink that will open that survey in editable view in another tab.
- Single and Multi-line text data and numbers are editable directly in the grid by double clicking the text (or the blank area where you know text would be), making your changes, and hitting the enter key. Only text and numbers can be edited directly in the Editable Grid. Other types of data such as locations, single and multi-choice questions must be edited in each individual data sheet.
Export your Wetland Report
The Wetland package includes the exact US Army Corps of Engineers Wetland Determination Data Form PDF export. To export the report:
- GO TO>PROJECT DATA > EXPORT
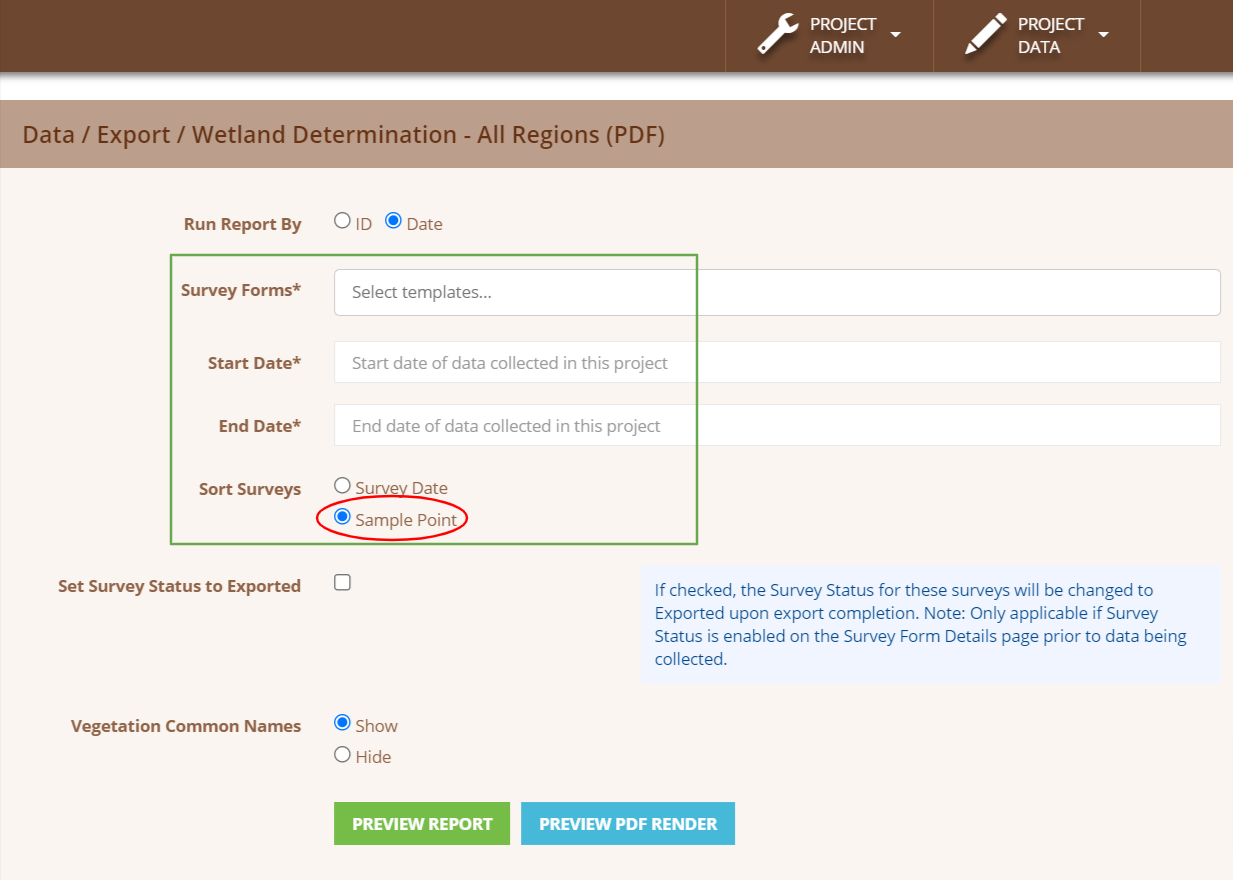
- Scroll towards the bottom of the export list and select the Wetland Determination export type.
- Select the Form and date range. You can run a bulk export this way.
- Choose Sort Surveys>Sample Point (Note: the label may be different)
- Click PREVIEW REPORT.
- Review your data.
- Click EXPORT TO PDF. Many users will run a preliminary export to PDF and use that in conjunction with the Editable Grid for QA/QC.
Export your Wetland Photo Report
The Wetland package also includes a Wetland Photo Export report builder.
- GO TO>PROJECT DATA > EXPORT
- Select Photo Log Builder.
- The first time you use the Photo Log Builder for your project, you will need to create a new Photo Log Template. Do so by clicking

- Name your Template.
- Select the Form(s) you want to pull the photos from.
- Choose your date range for the data you wish to include in your report.
- Customize your report by choosing the specific parameters you need.
- Click SAVE TEMPLATE.
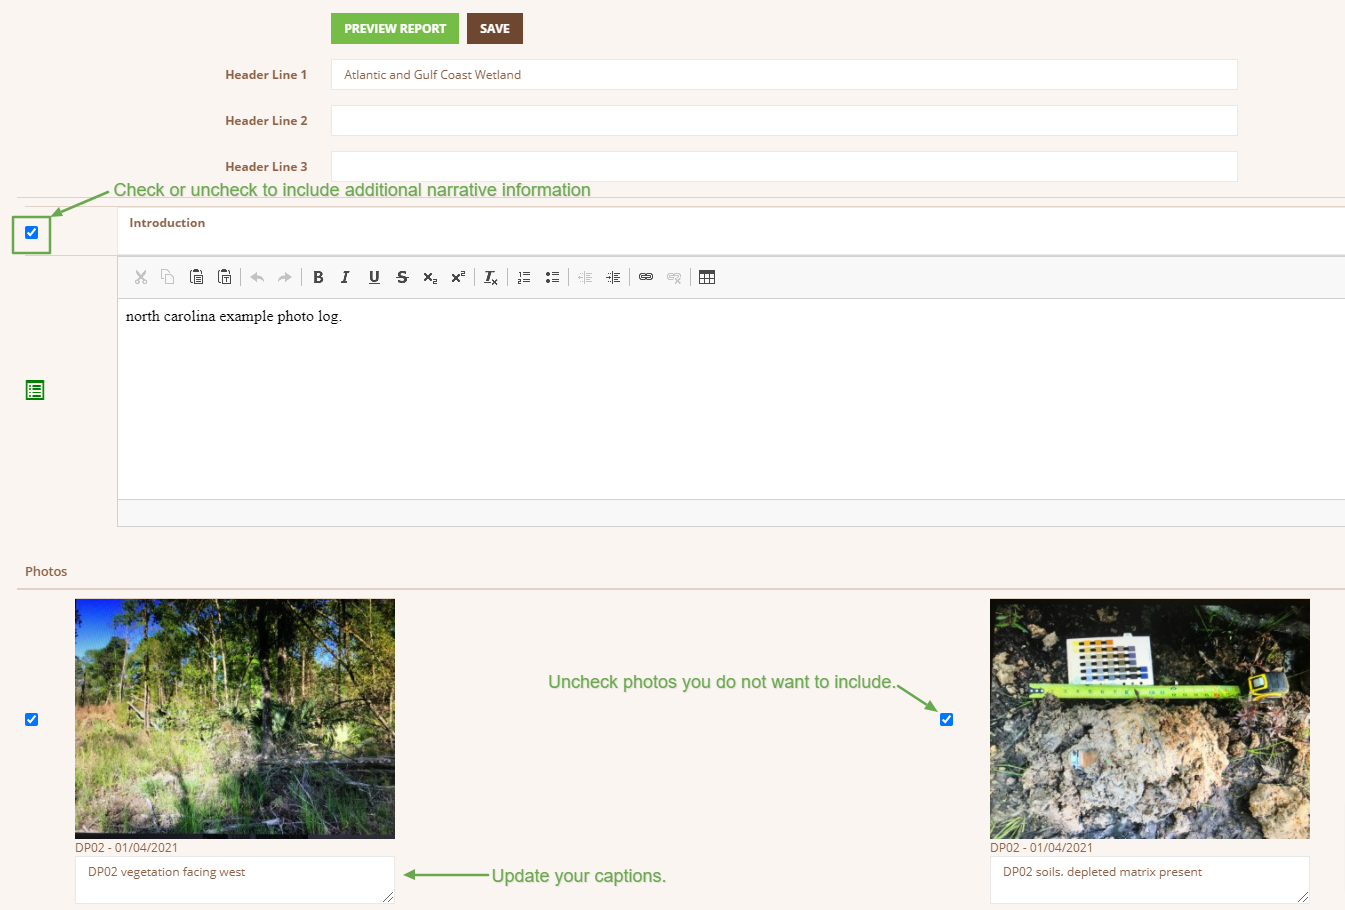
- Scroll down the page and you will now see all photos along with additional optional narrative text at the beginning and/or end of the photo report. You can choose what photos to include.
- Update your photo captions as needed. Note: changes to the captions are only reflected in this report and do not change the underlying data.
- PRO TIP: Each photo has the Survey ID in the top left corner. This is a hotlink that will take you directly to this photo in the survey in the event that you need to rotate the photo, change the caption, or replace the photo.
- Click PREVIEW REPORT, and if satisfied, click EXPORT TO PDF.